VPNCity Blog
POPULAR
  • Transparency Report
No Result
View All Result
  • Pricing
  • Servers
  • What is a VPN?
  • Download VPN
    • Windows
    • Android
    • MacOS
    • iOS
    • Android TV
    • Fire TV Stick
    • Chrome Extension
    • Firefox Extension
    • ShadowSocks
  • Blog
  • Setup Guides
    • Windows
    • MacOS
    • Linux
    • Android
    • iOS
    • Gaming Consoles
    • Raspberry Pi
  • Login
VPNCity Blog
  • Pricing
  • Servers
  • What is a VPN?
  • Download VPN
    • Windows
    • Android
    • MacOS
    • iOS
    • Android TV
    • Fire TV Stick
    • Chrome Extension
    • Firefox Extension
    • ShadowSocks
  • Blog
  • Setup Guides
    • Windows
    • MacOS
    • Linux
    • Android
    • iOS
    • Gaming Consoles
    • Raspberry Pi
  • Login
No Result
View All Result
VPNCity Blog
No Result
View All Result

How to setup a VPN on Android with OpenVPN

04/02/2019
in Android
3 min read
0

Here is the step by step guide on how you can manually configure your VPN on an Android device.

  • This guide assumes that you already have OpenVPN installed on your device. If you do not have it installed already, please do that first by visiting the Google Play store and searching for “OpenVPN”.

Please follow the steps below

1. Log in to  your VPNCity account from your Android Device

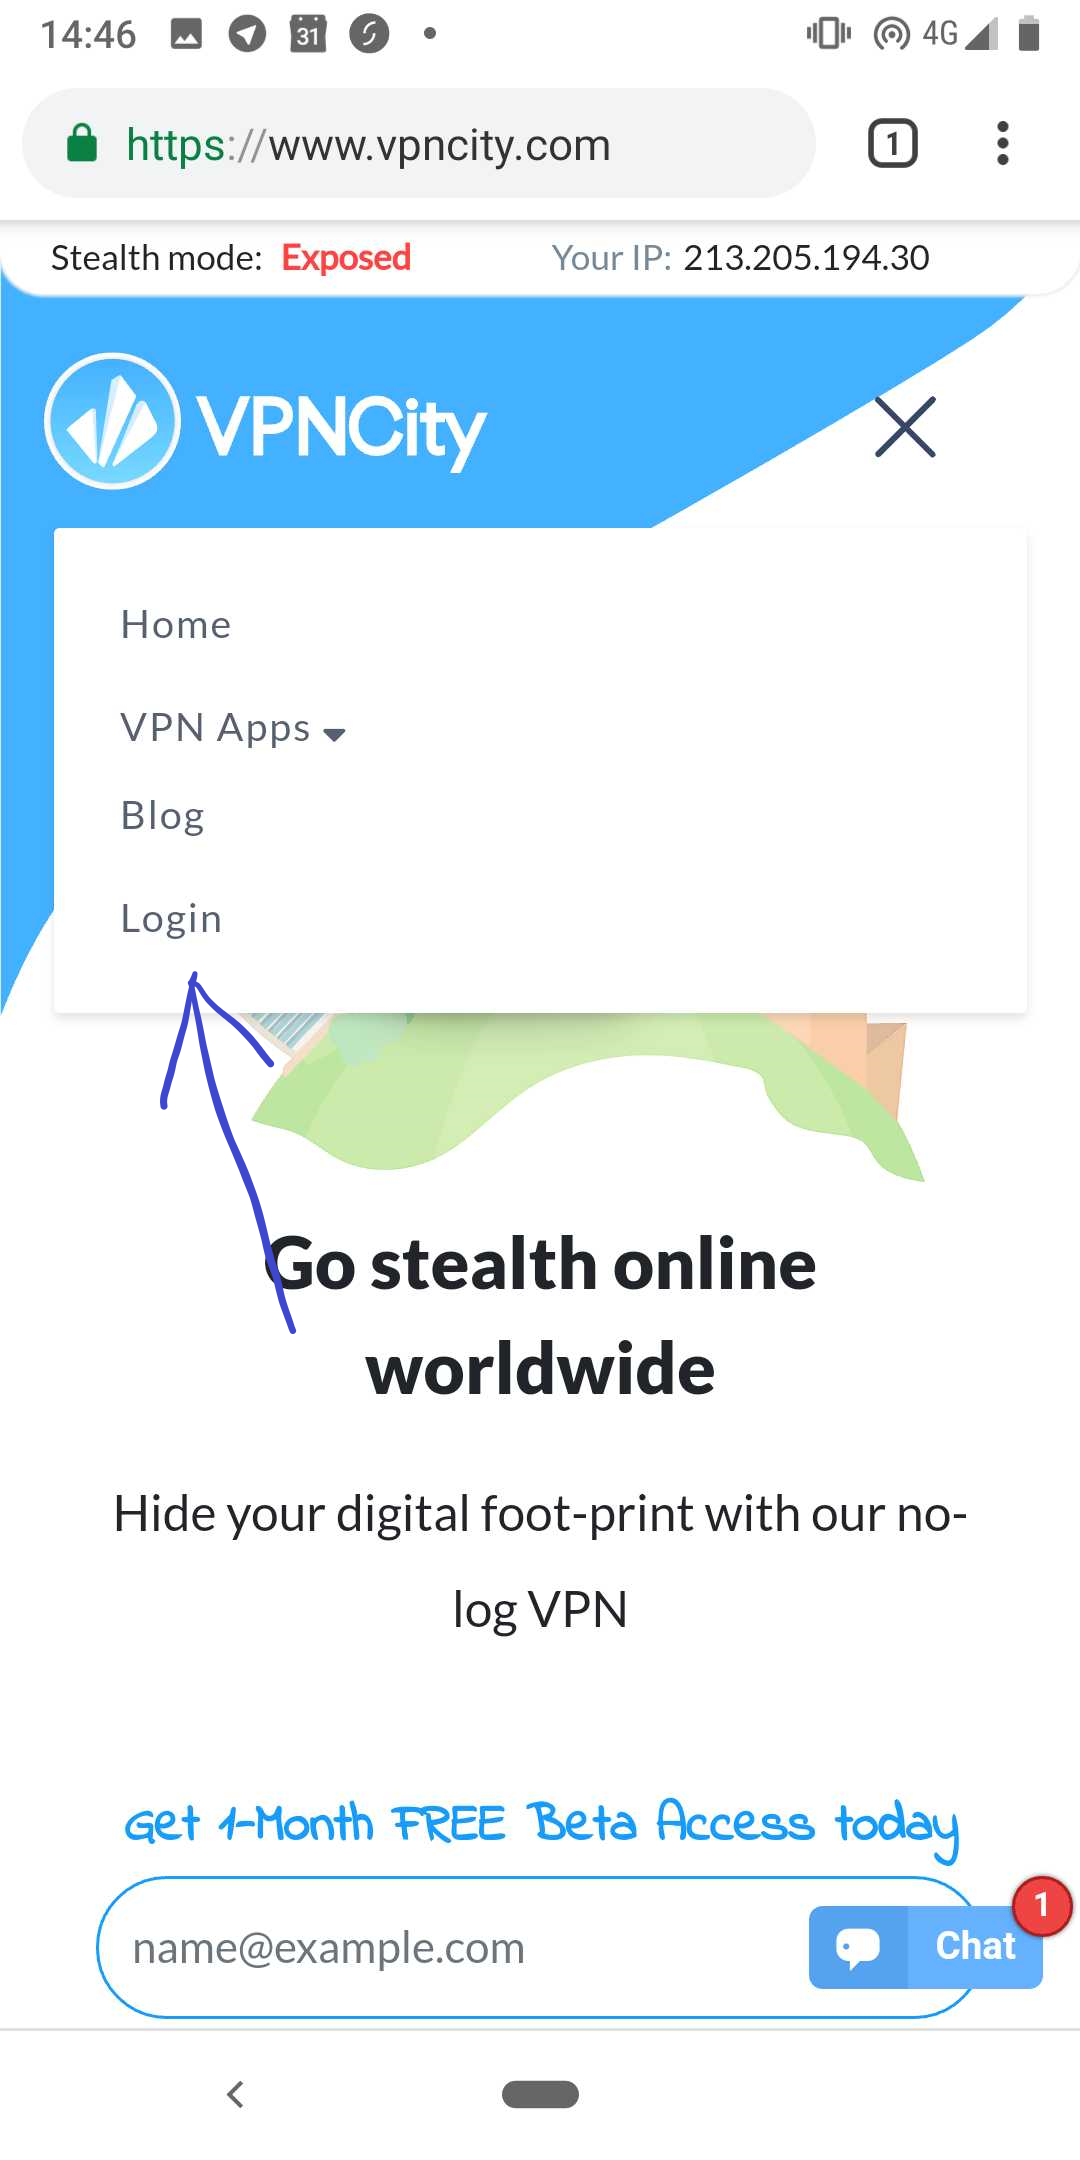
2. You’re now at “My Account“. From here, find “Advanced Settings” under your VPN Plans (highlighted below)

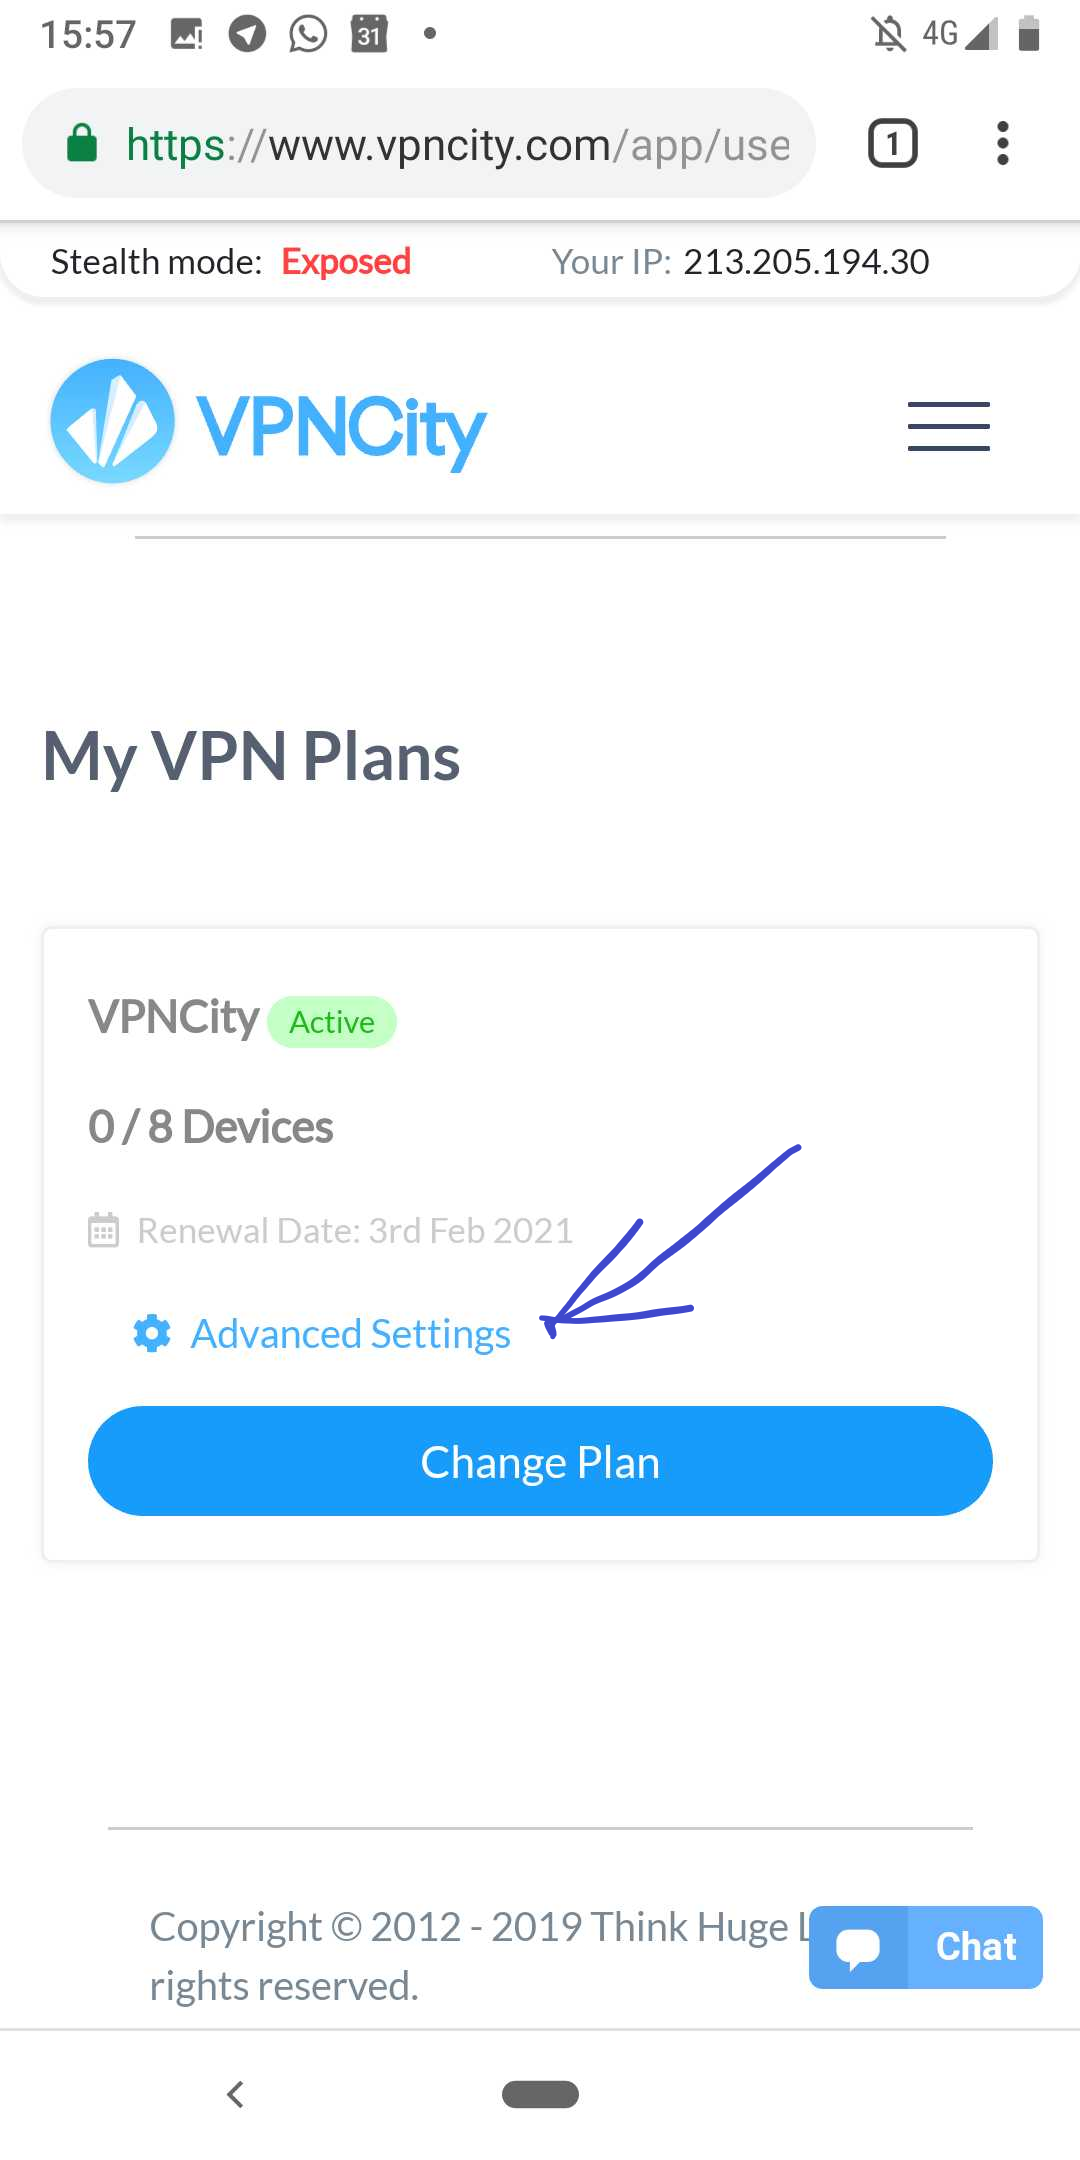
3. Now click “Add Device” as per below

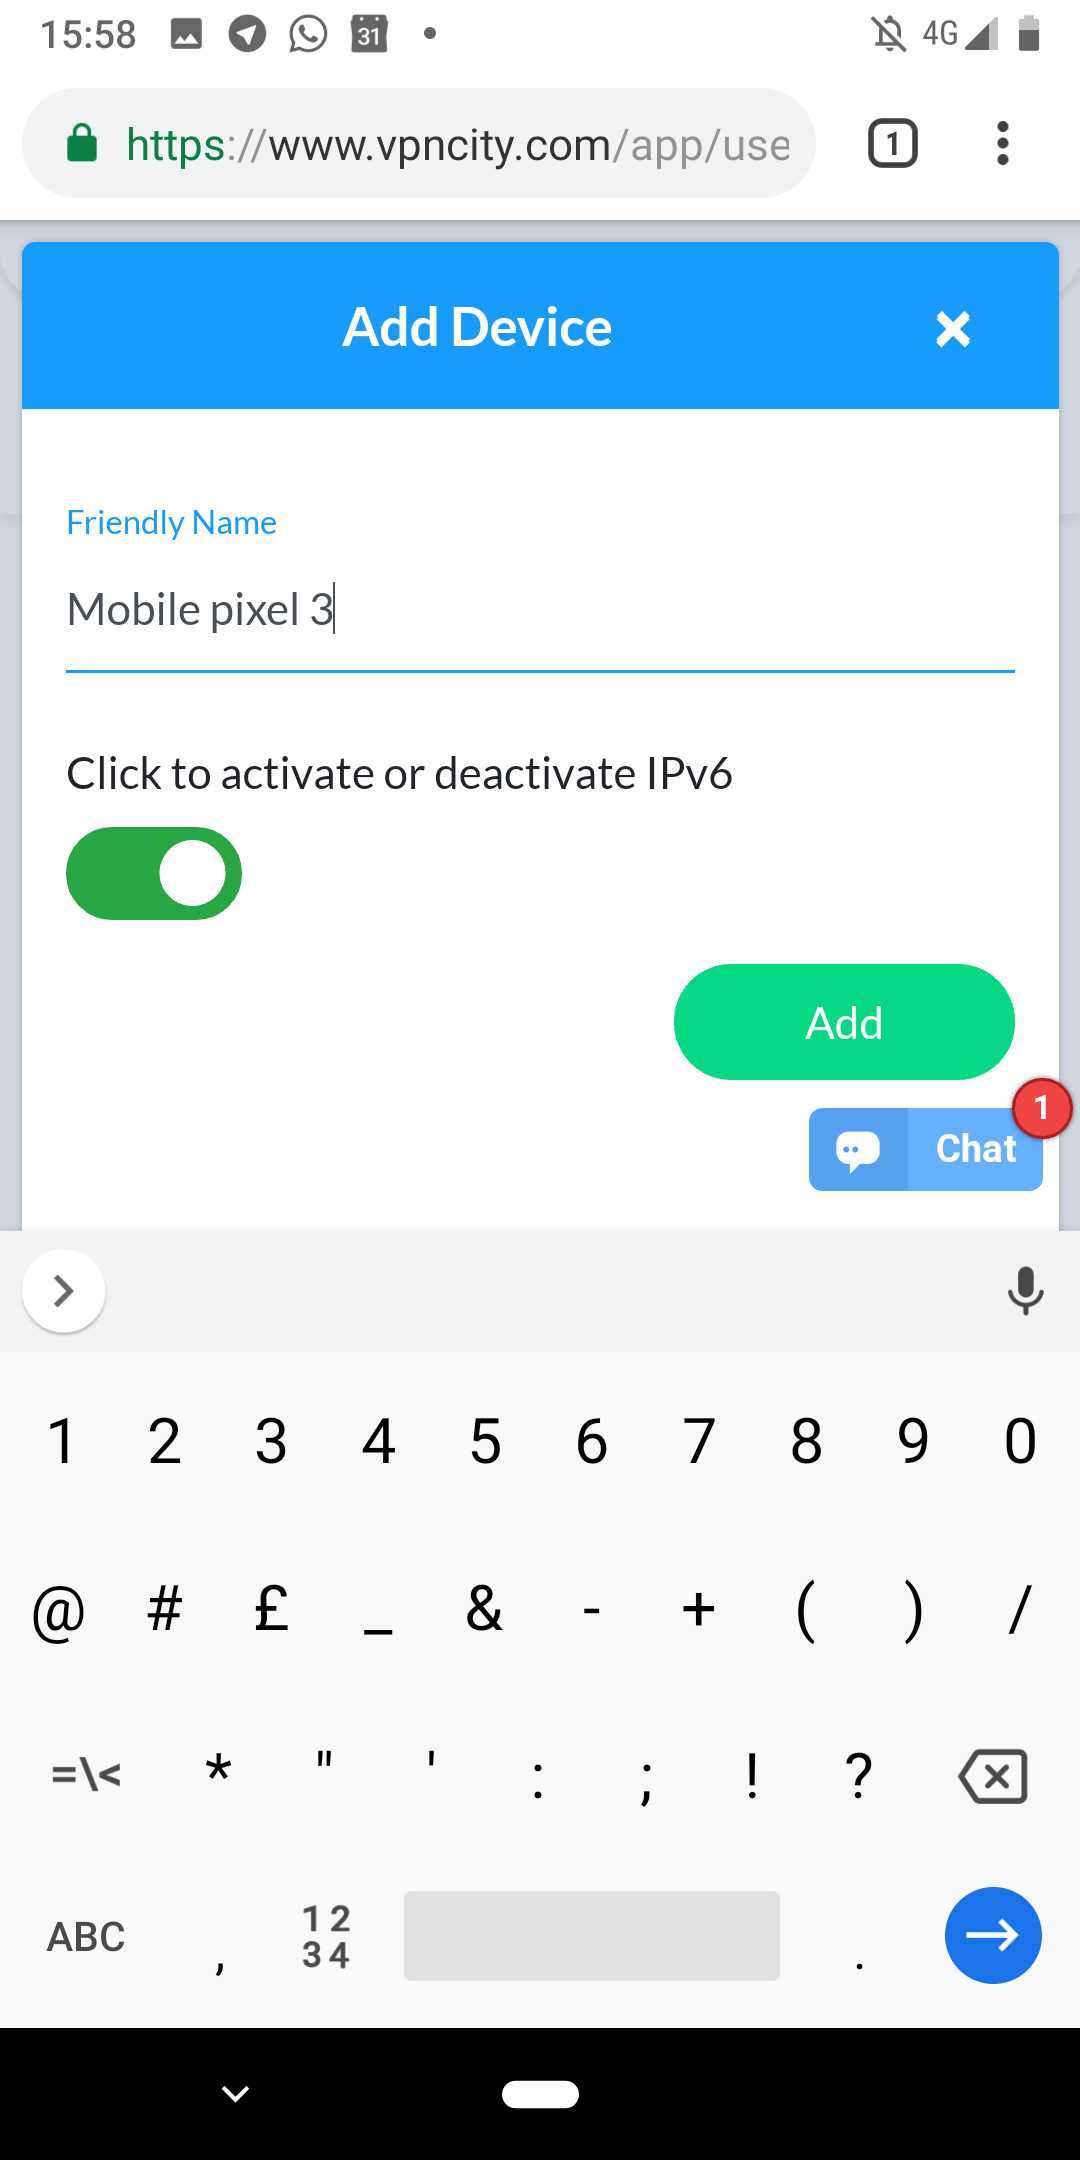
4. You will see a pop-up like below. Choose a “Friendly Name” and then click “Add”

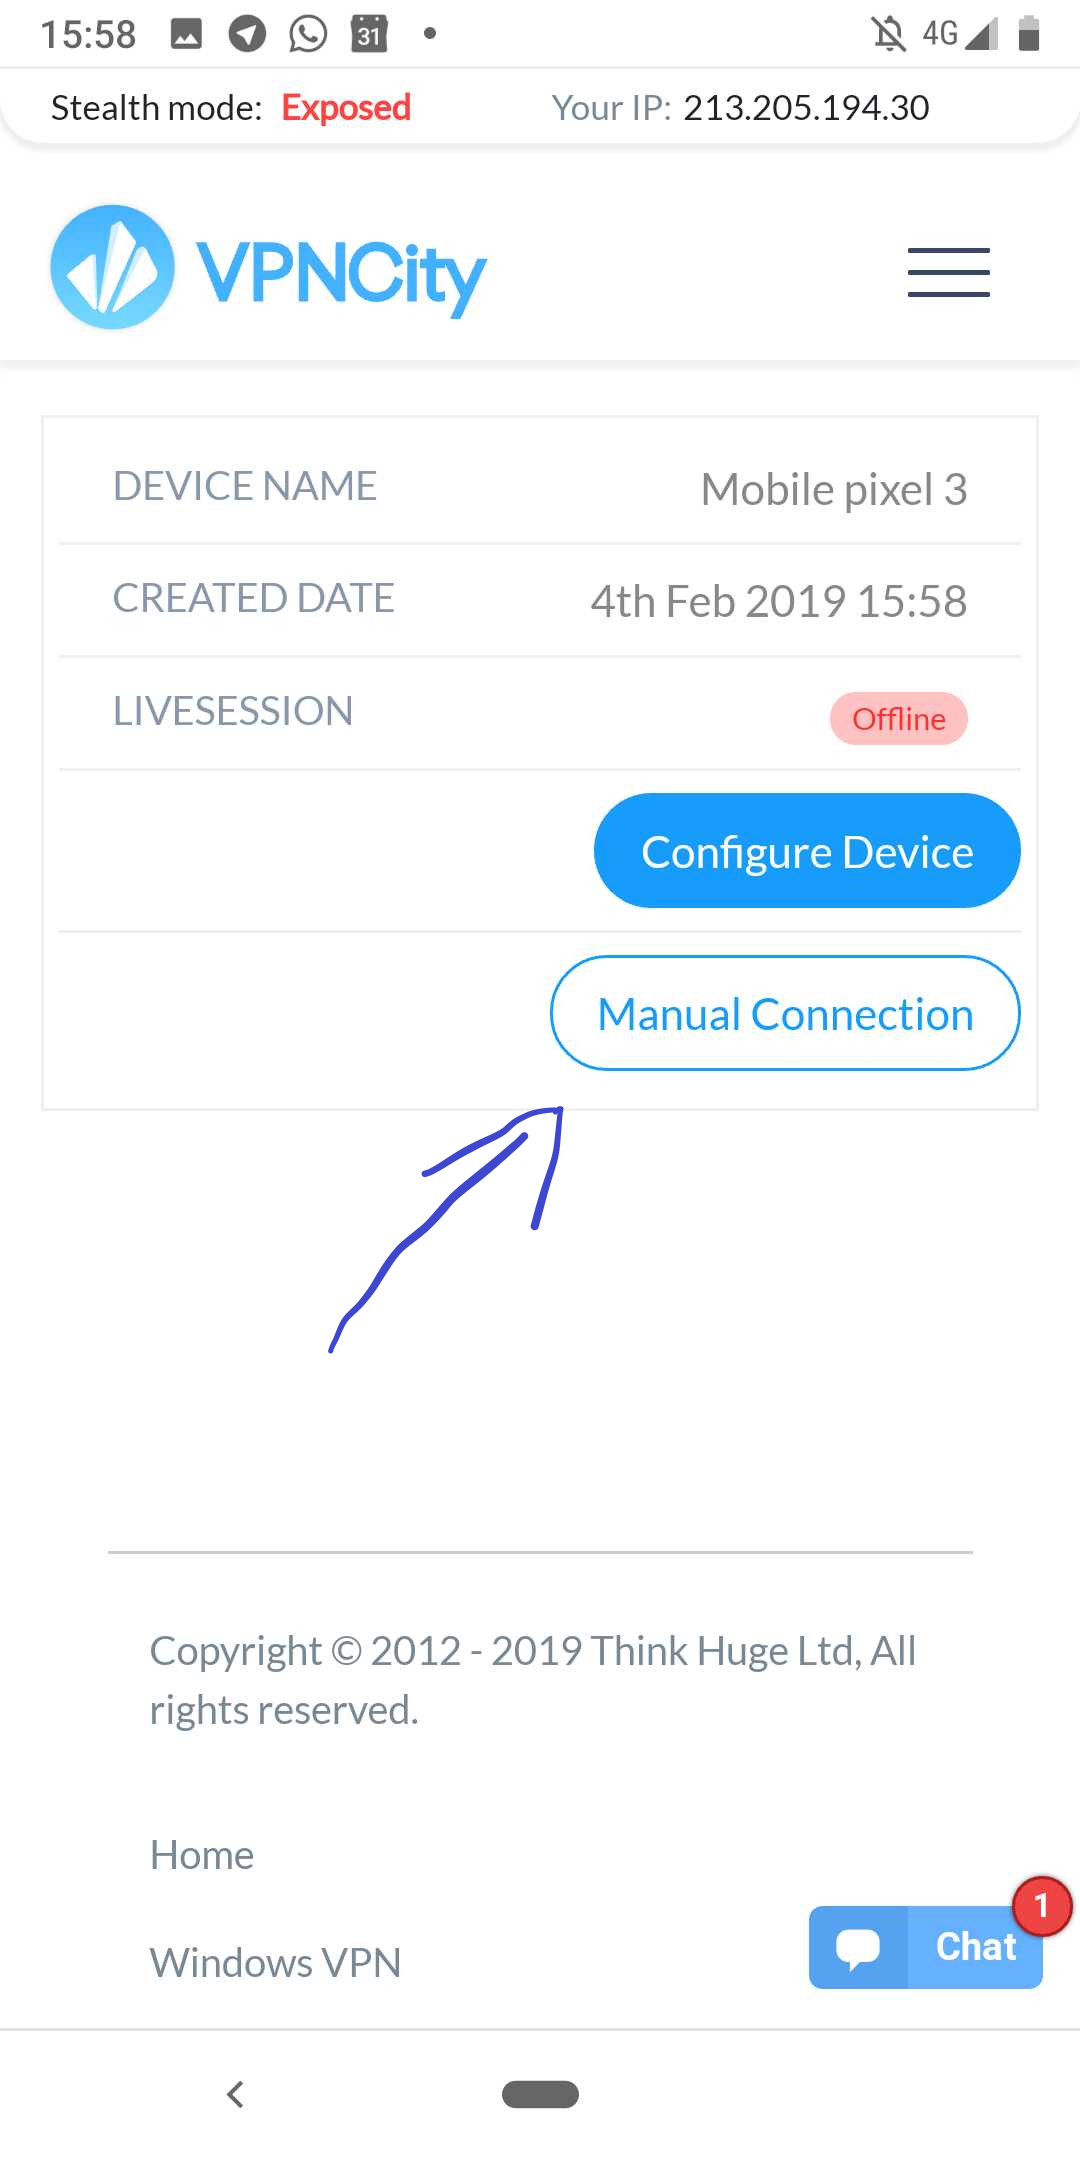
5. Next, click on “Manual Connection” for this device.

6. You’ll see a pop-out like below. Make a note of your “Username” and “Password”.

You can select the location you want to connect this device to and then click to “Download OpenVPN Config”

You should see a download complete notification appear after clicking the download button.

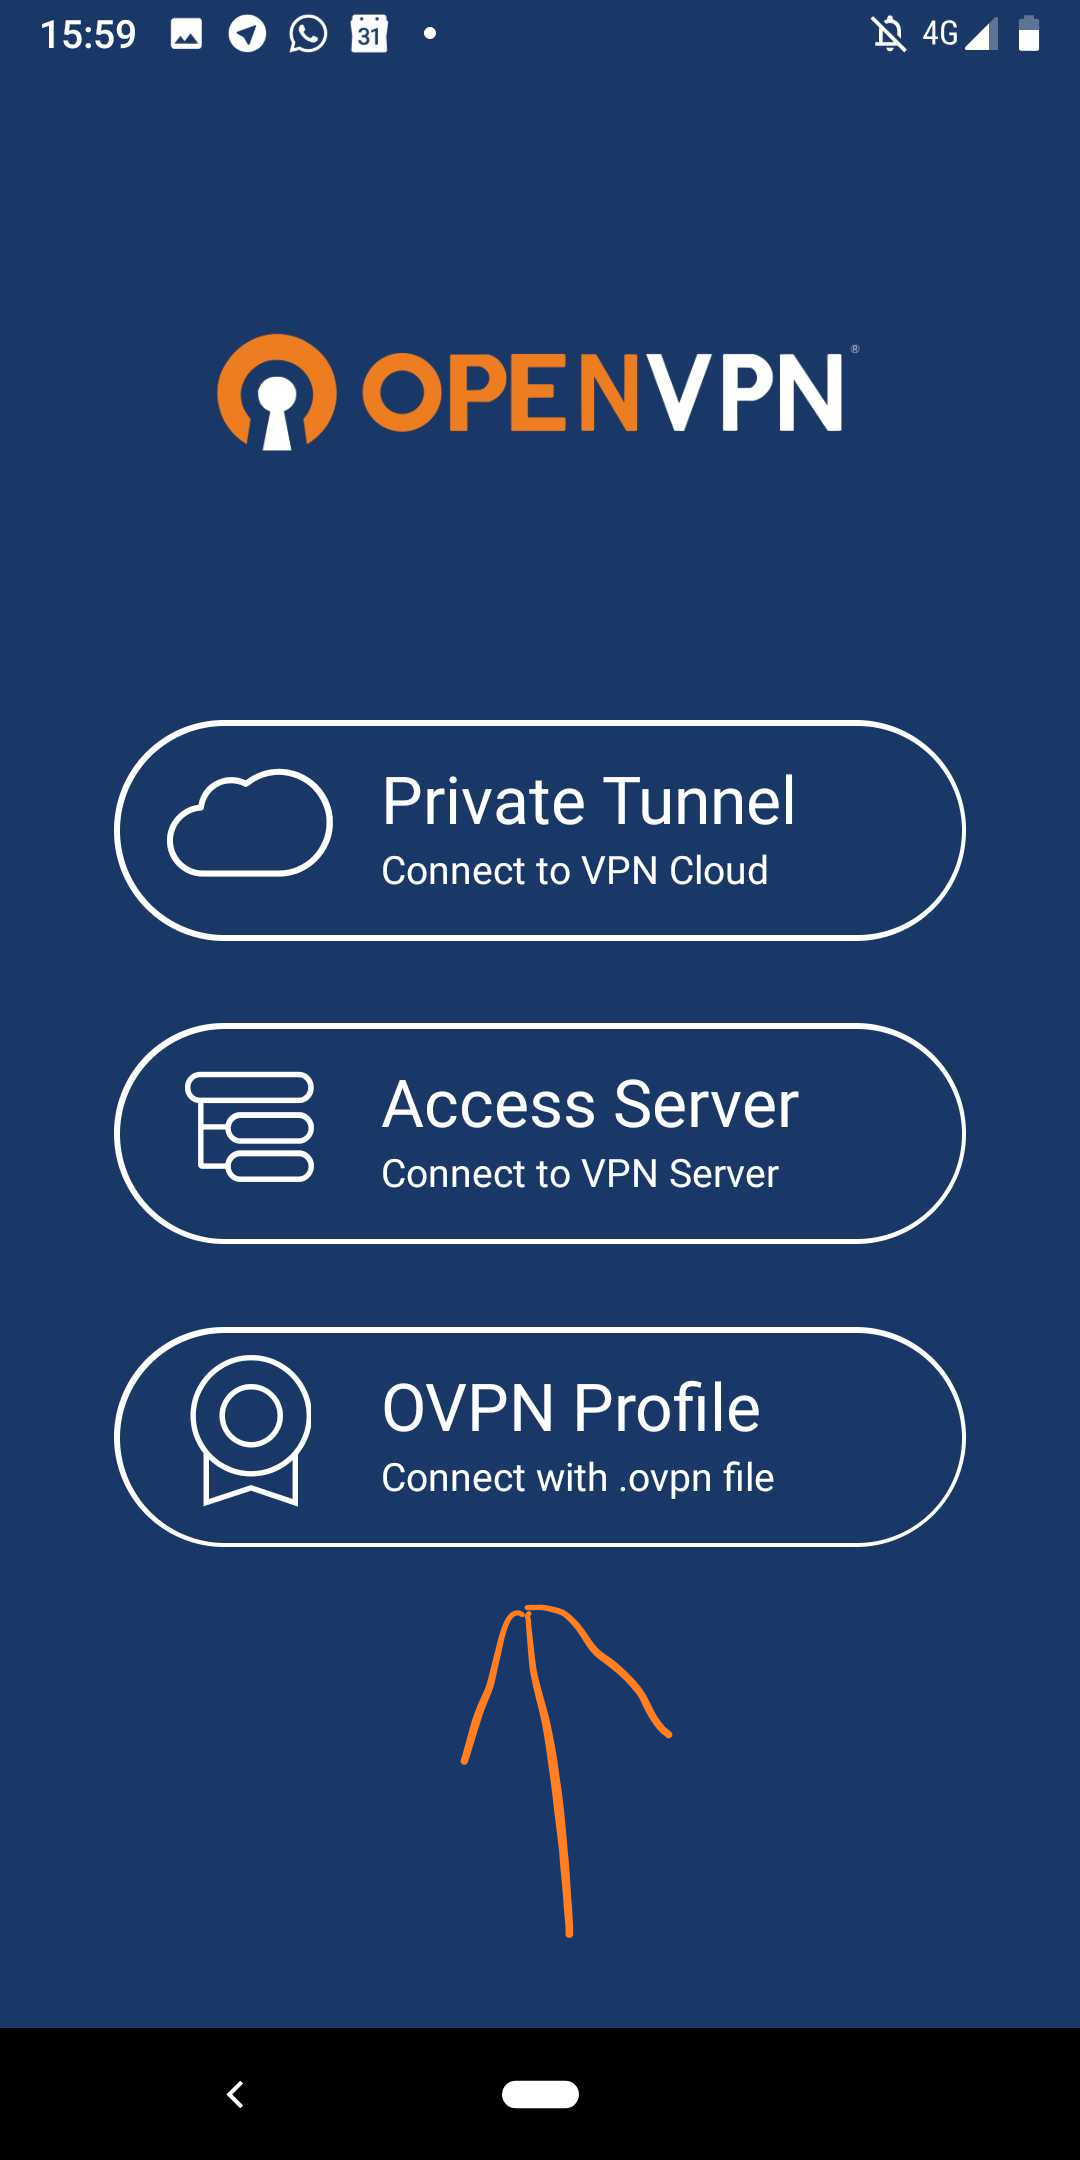
7. Now launch OpenVPN. One the home screen, select “OVPN Profile” option.

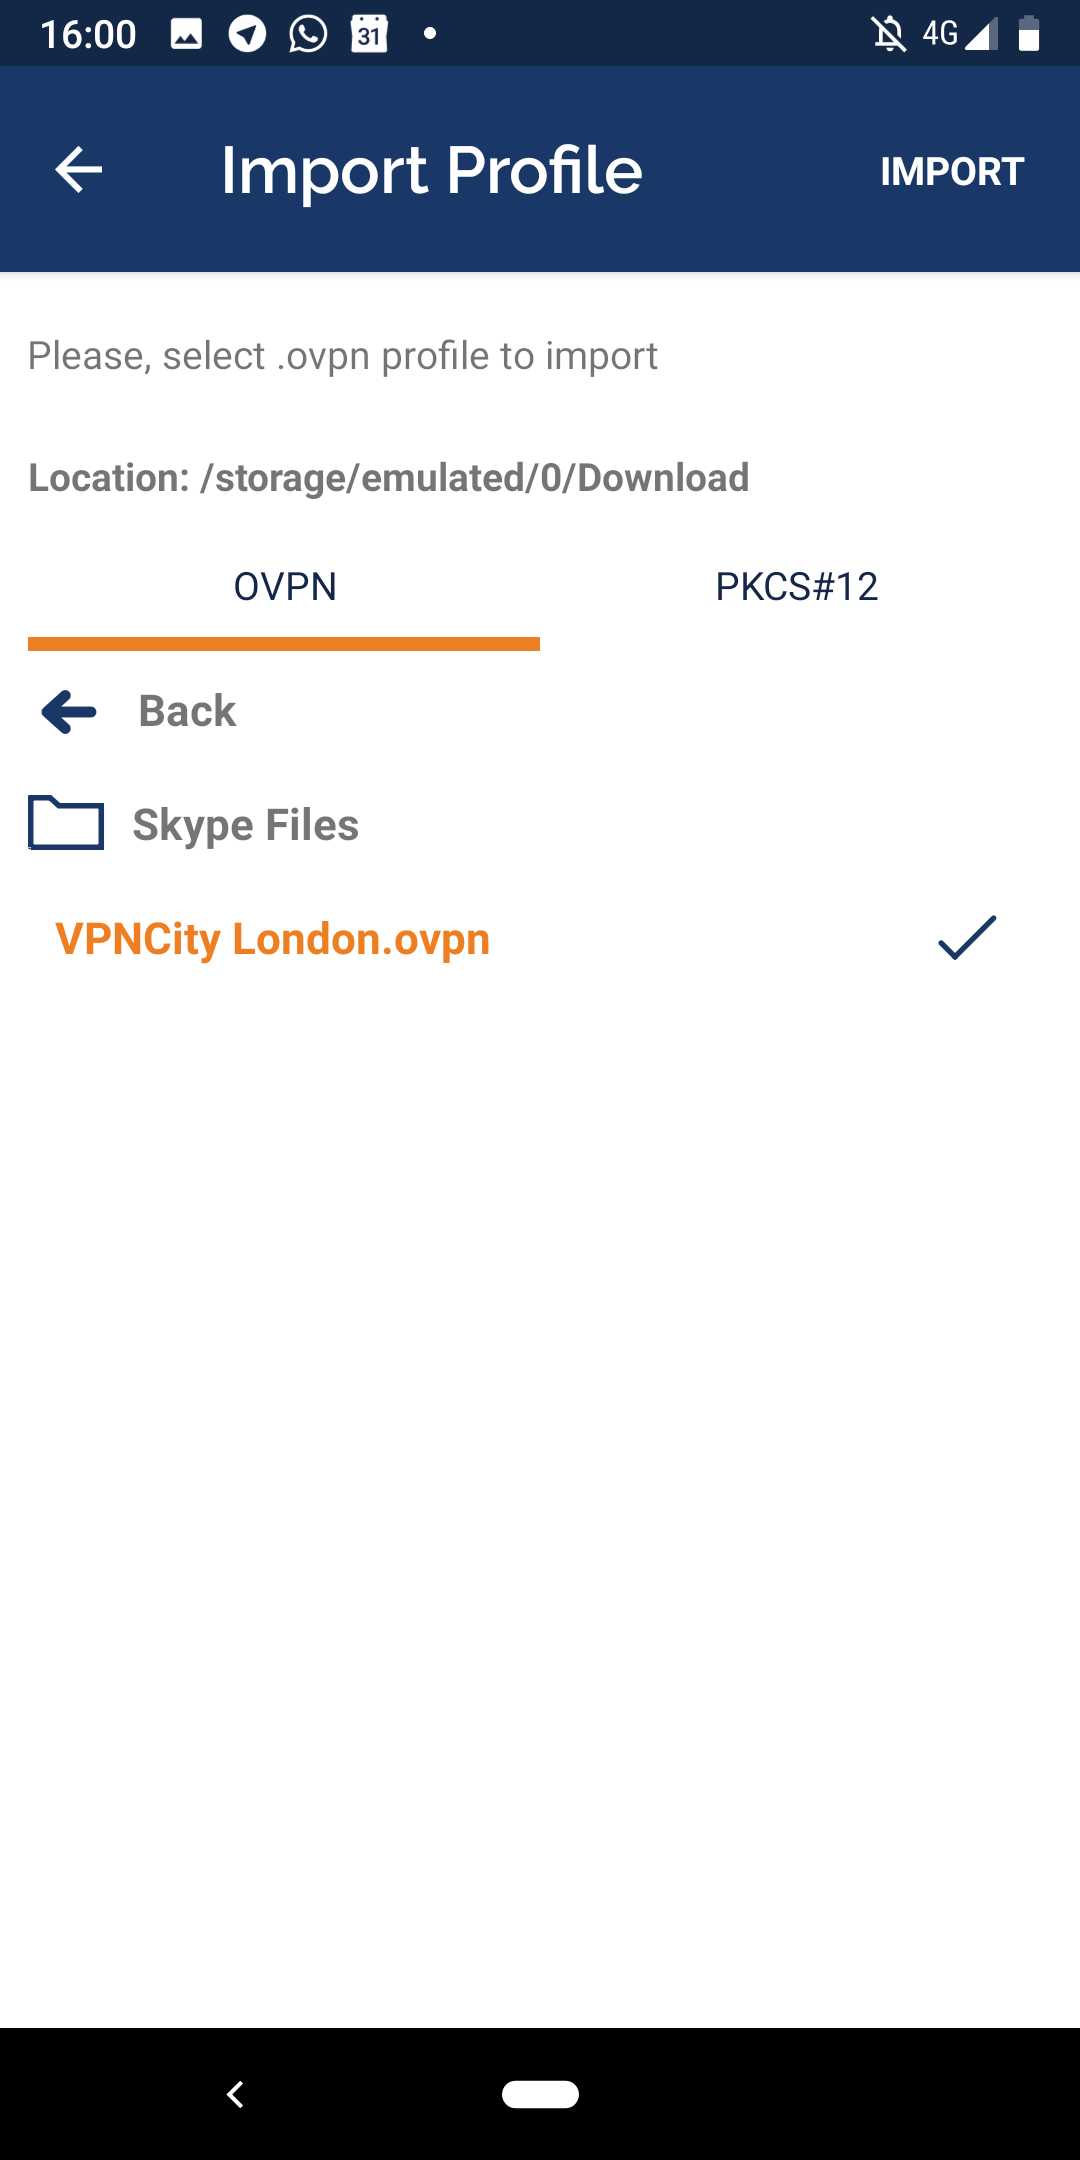
8. Then find the “Download” folder.

9. Select the VPNCity ovpn config file and then click “Import” in the top right.

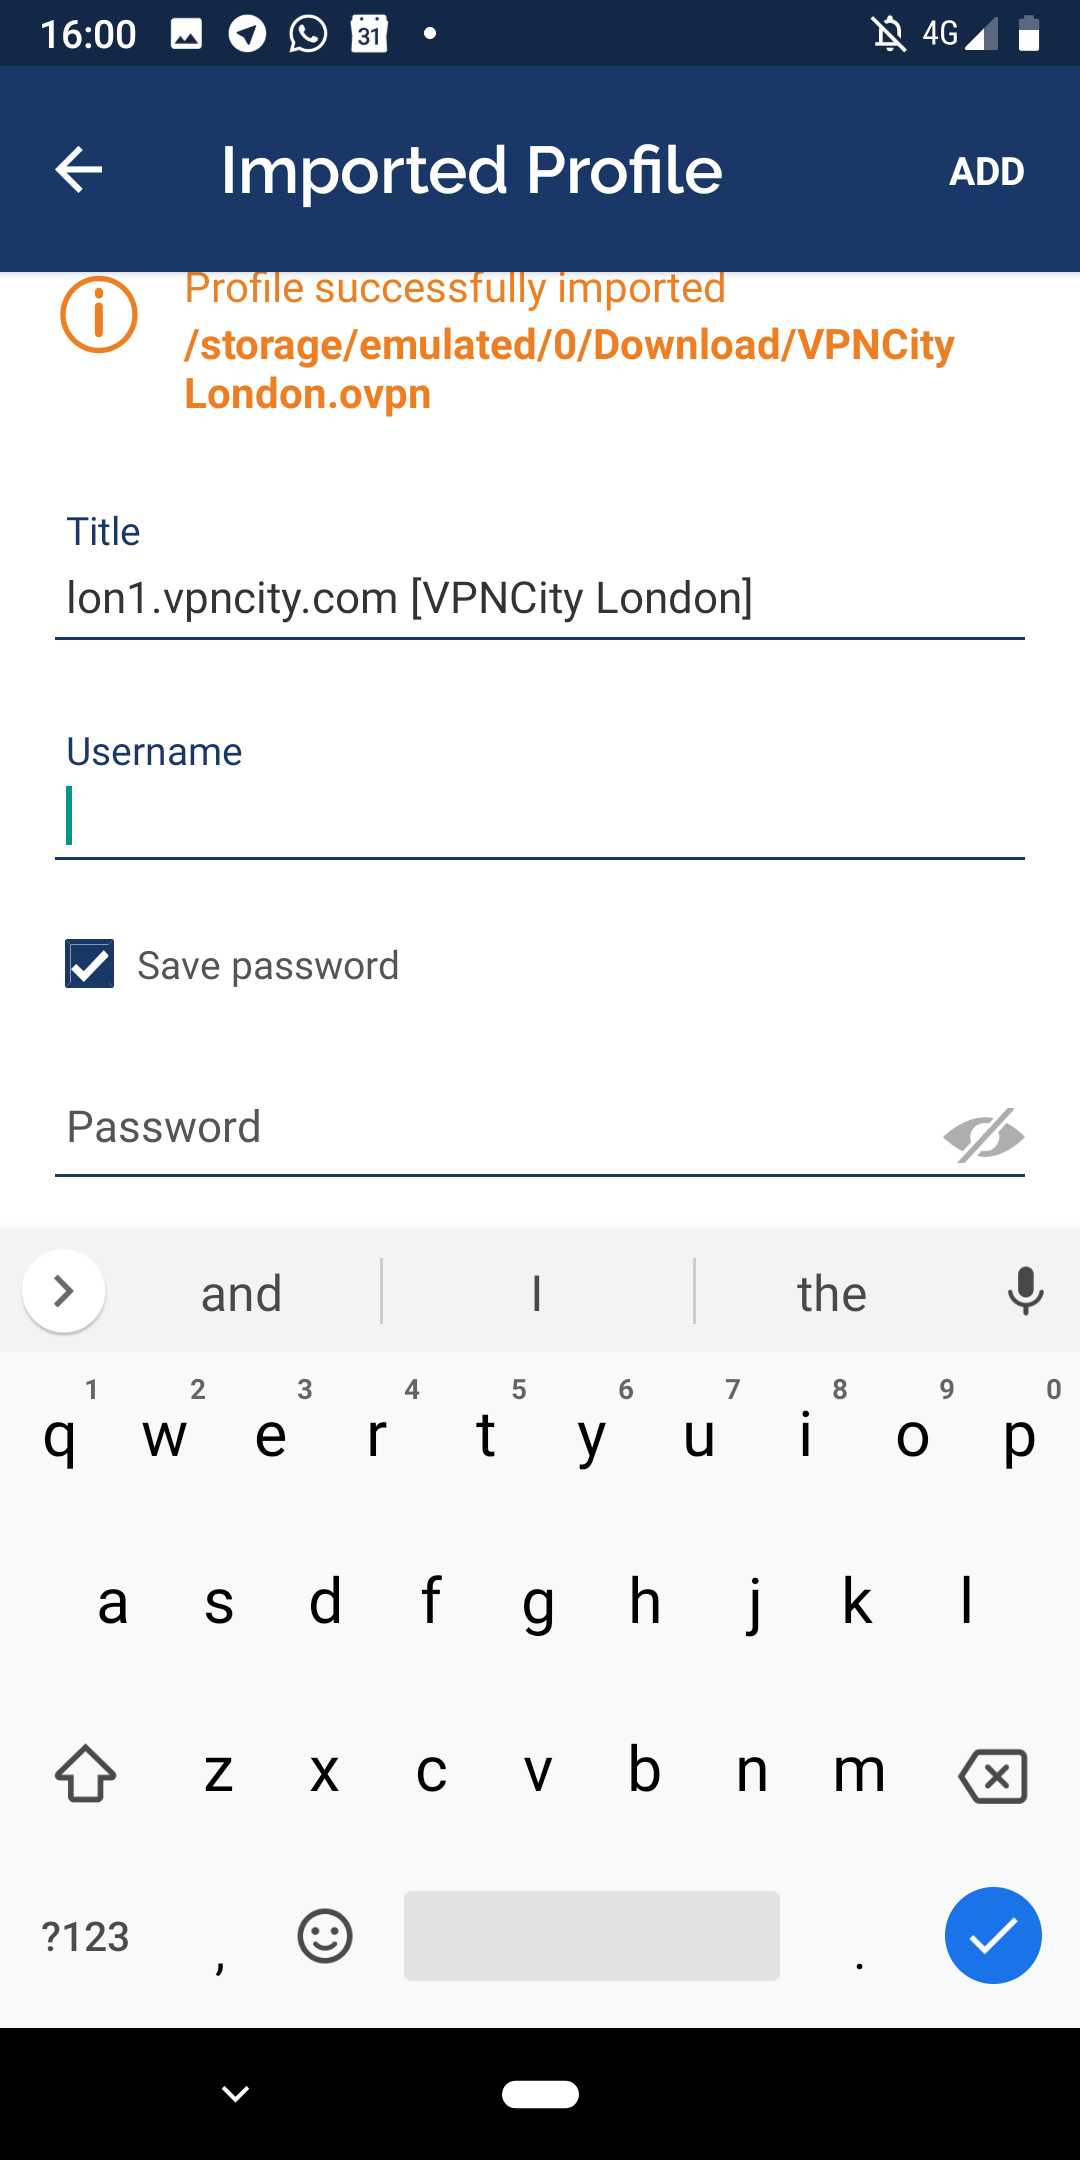
10. Remember the username and password from step 6? Enter these details below (tick the box “save password”).

Once you’ve entered the correct details, hit “Add” in the top right.

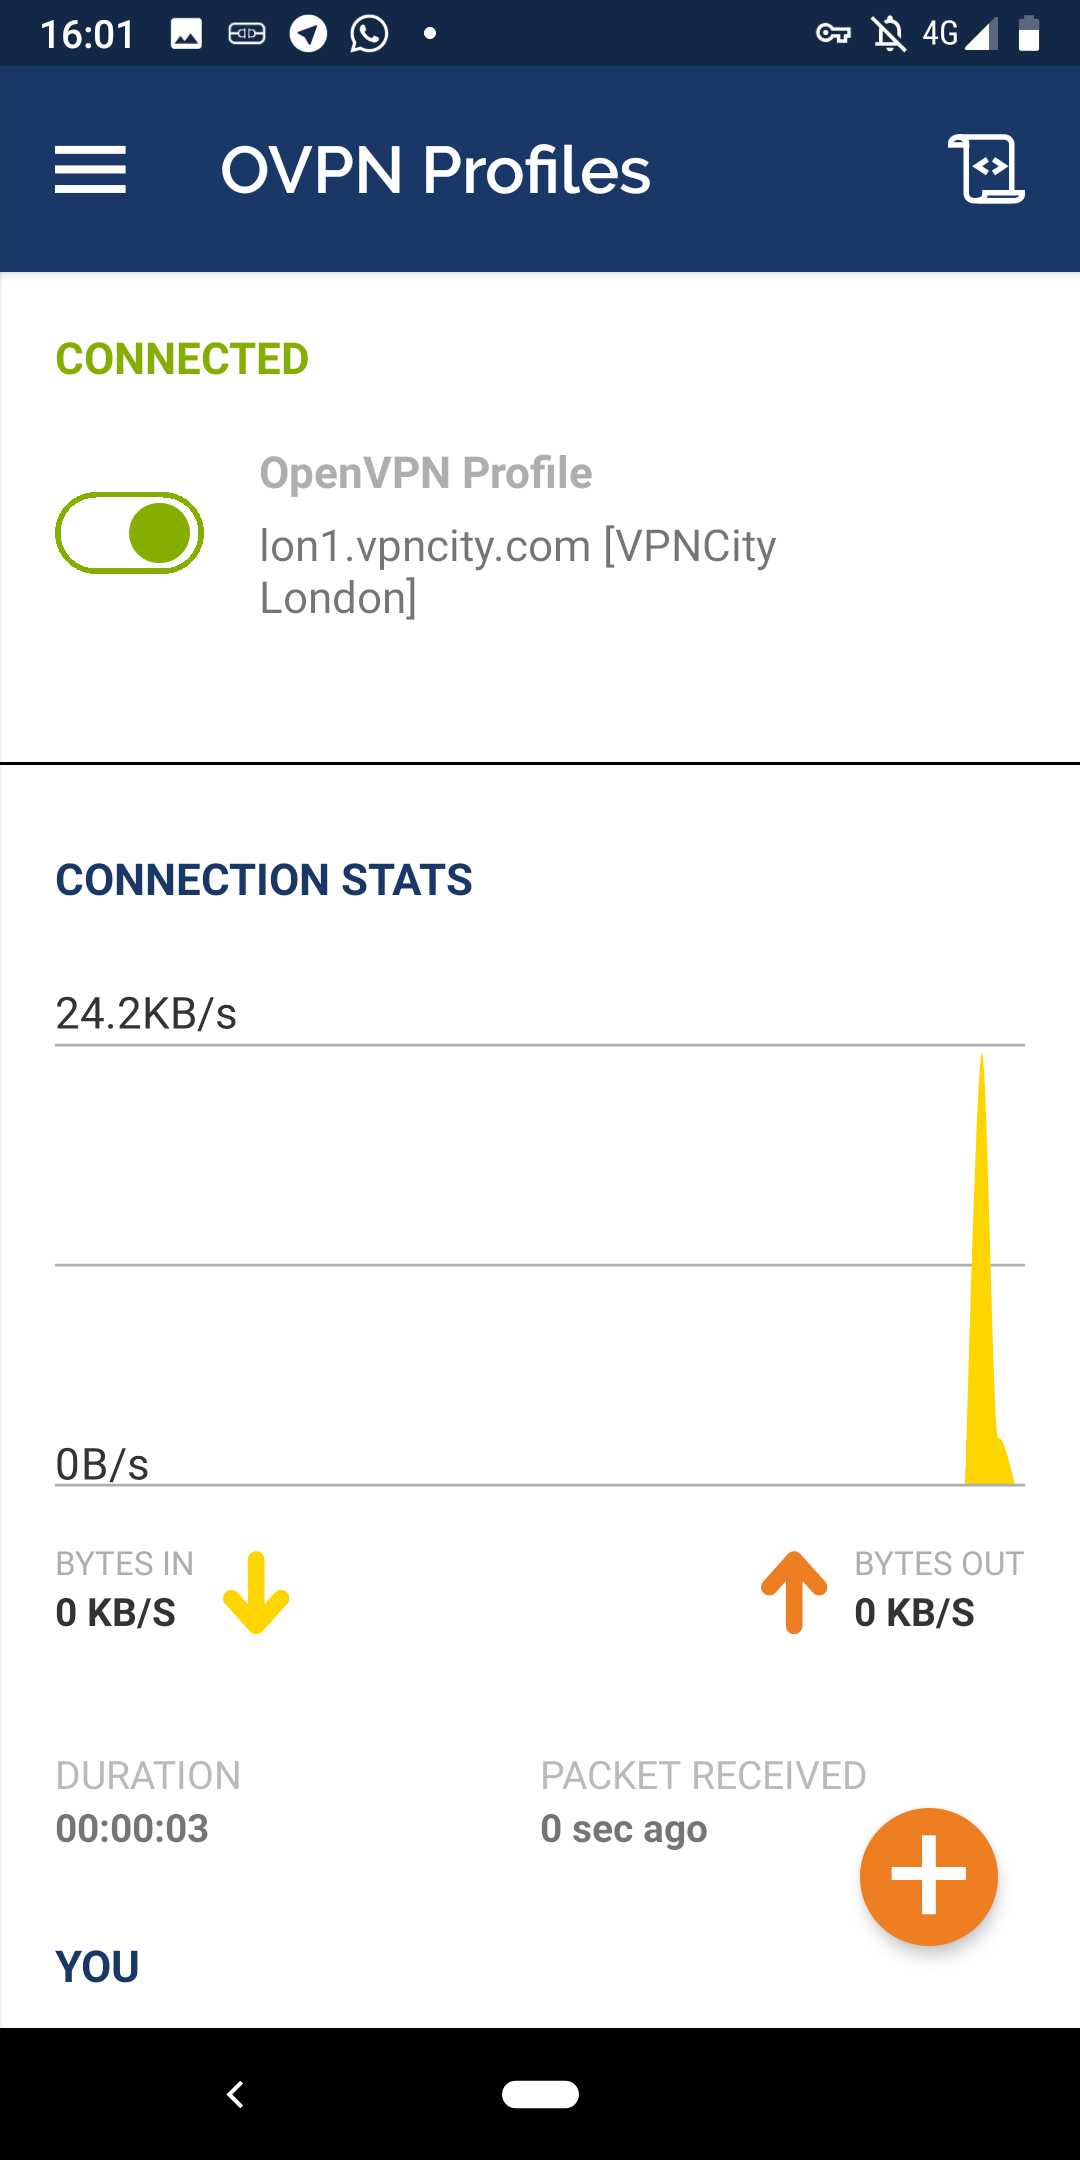
11. Now click the toggle button to Connect.

12. you’re now connected to VPNCity (you can minimise OpenVPN and it will run in the background).

If you require any help or assistance, please reach out to us on live chat (which you’ll find in the lower right corner of this screen). Alternatively, you can always use our VPNCity Android App to quickly, easily and securely connect to any of our locations around the world on multiple devices.

Related Posts

WireGuard VPN
Android

WireGuard VPN – How to Install and Use It with VPNCity

08/03/2022
Android

How to Install VPNCity on Android TV

10/07/2019
Android

How to install and connect to VPNCity Android App

04/02/2019
Load More
Next Post
How to Access BBC iPlayer From Outside the UK

How to Access BBC iPlayer From Outside the UK

What is Easy Firewall Traversal?

Recommended

What is Shadowsocks and Why Do I Need It?

10/03/2022

VPNCity & ThatOnePrivacySite

09/06/2022
VPN In India … Its here!

India Servers Removal

08/06/2022

What is the Ad Blocking Feature and Why Should I Enable It?

10/03/2022

VPNCity

  • Home
  • Pricing
  • Server locations
  • What is a VPN?
  • Contact Us

Apps

  • Windows VPN
  • Android VPN
  • iOS VPN
  • Chrome VPN
  • Firefox VPN

Info

  • How-To Guides
  • Terms of Service
  • Privacy Policy
  • Warrant Canary
  • Reviews

Account

  • Login
  • Affiliates
  • Refer a friend
  • VPN for Business

Download our Apps

Copyright © 2012 – 2022 VPNCity, All rights reserved.

No Result
View All Result
  • Pricing
  • Servers
  • What is a VPN?
  • Download VPN
    • Windows
    • Android
    • MacOS
    • iOS
    • Android TV
    • Fire TV Stick
    • Chrome Extension
    • Firefox Extension
    • ShadowSocks
  • Blog
  • Setup Guides
    • Windows
    • MacOS
    • Linux
    • Android
    • iOS
    • Gaming Consoles
    • Raspberry Pi
  • Login