Download VPNCity App for Windows here
Configure IKEv2 VPN Connection
- click on any of the screenshots below to enlarge
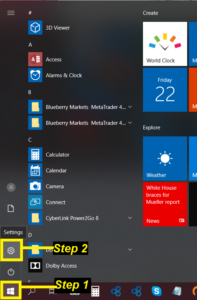
1. Click on the Windows button on the lower left corner of your toolbar
2. Click Settings
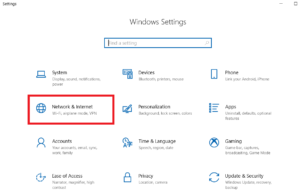
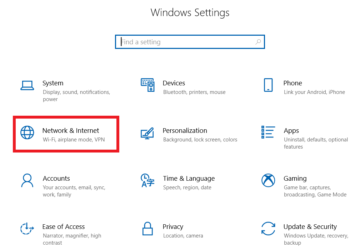
3. In Windows Settings, click on Network & Internet
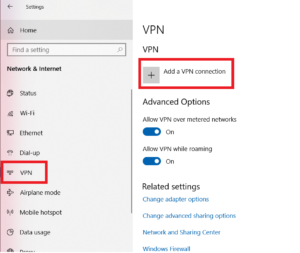
4. Click on VPN on the options on the left bar
5. Click Add a VPN connection
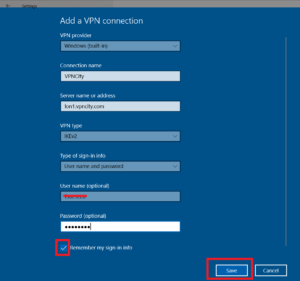
6. Fill in required fields
- VPN Provider: Windows (built-in)
- Connection Name: VPNCity (or any you wish to specify to personalize it. ex: MyVPNCity)
- Server Name or address:
- To find this, log on to client portal here: https://www.vpncity.com/
- enter your email and password > click Login
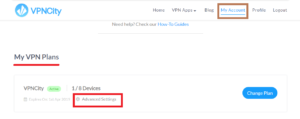
- Click on My Account
- Under My VPN Plans, click on Advanced Settings
- To find this, log on to client portal here: https://www.vpncity.com/
-
- Click on Manual Connection
-
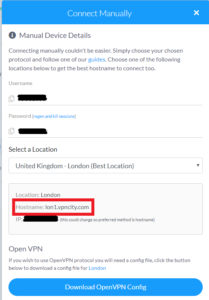
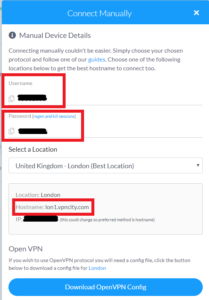
- Under Manual Device Details, copy Hostname
- VPN Type: IKEv2
- Type of sign-in info: User name and password
- Username: Your VPNCity Username (also retrieve from Manual Device Details)
- Password: Your VPNCity Password (also retrieve from Manual Device Details)
- Remember my sign-in info: Check
7. Click Save
Connect to the VPNCity Server via IKEv2
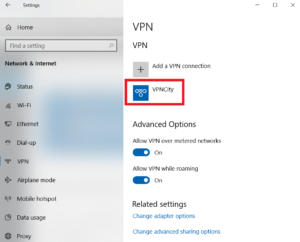
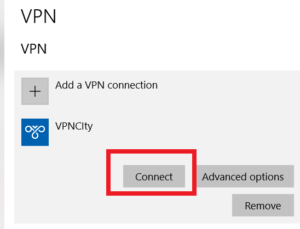
1. From the list under VPN, select VPNCity
2. Click Connect
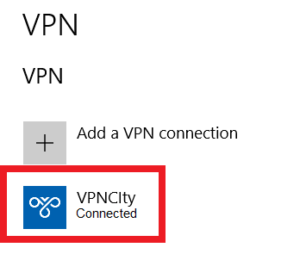
3. Wait for Status to show “Connected”
and, voila! You are all set and connected via IKEv2 for VPNCity!
If you need further assistance, we are available to assist you via Live Chat 24 hours a day Mondays through Fridays (just click on the light blue button on the lower right corner of this page), and via email 24/7 at support@vpncity.com so you may reach out to us at your most convenient time.


